
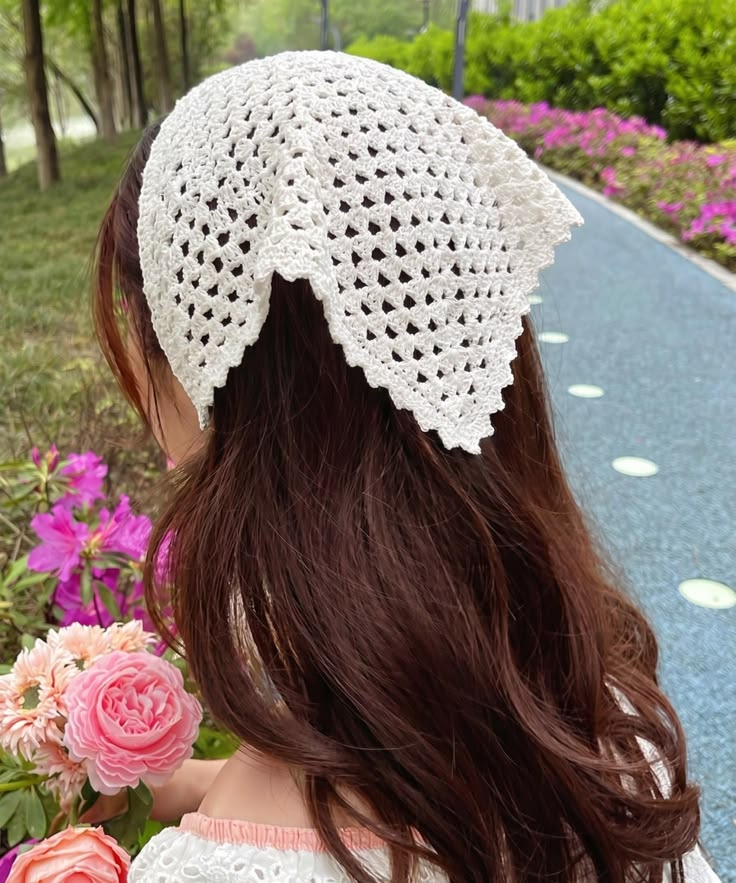
Free Crochet Bandana Pattern: A Lightweight Triangle Head Scarf
A crochet bandana is a small project with plenty of possibilities: wear this crochet hair bandana over loose hair, tie it behind a bun, or fold the edge into a narrow scarf. An open stitch pattern keeps the fabric flexible, while adjustable ties let you change the fit without adding elastic or a button.
This free crochet bandana pattern uses a simple mesh triangle worked from the bottom point toward the forehead edge. You will increase at both sides, repeat the same row until the triangle reaches your preferred size, and finish with a narrow border and two ties.
Pattern status: This original InfoCrochet pattern is an untested draft. It needs physical crochet testing to confirm stitch counts, shaping, fit, yarn usage, and finishing before it is presented as a tested pattern. The measurements below are design targets, not measured sample results.
Is This Crochet Bandana Suitable for Beginners?
Yes, if you already know how to chain, single crochet, and double crochet. The body repeats one mesh row. You will also need to recognize the top of a turning chain and increase at both row ends.
If you are completely new to crochet, practice a small double crochet swatch first. Work slowly on the first few triangle rows and count the mesh spaces before turning. A stitch marker in the top of the turning chain can make the row ends easier to find.
This is a single triangle construction. There are no separate lace motifs to join and no band to sew onto the scarf.
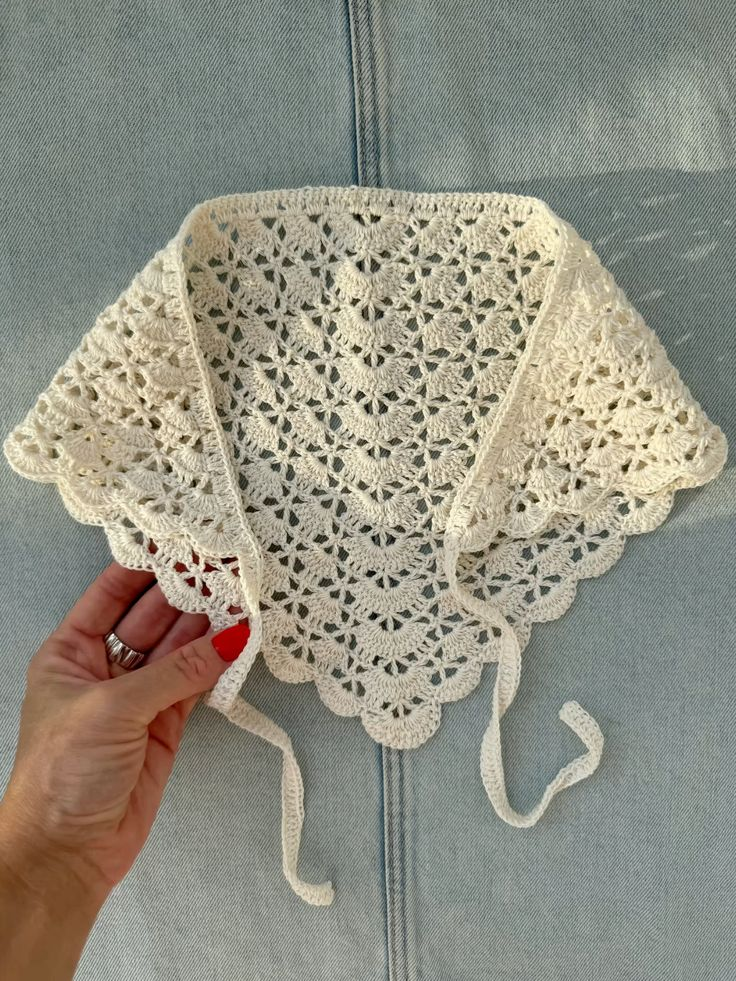
MATERIALS FOR THIS FREE CROCHET BANDANA PATTERN
The following supplies are a starting point for testing this design:
- Smooth sport-weight cotton yarn; have approximately 200 m available. Actual consumption has not been measured.
- A 3.5 mm crochet hook as a starting point, adjusted to suit your yarn and tension.
- Two stitch markers.
- A yarn needle.
- Scissors and a flexible measuring tape.
Choose a smooth, light-colored yarn for your first attempt so that you can see the stitch tops and chain spaces clearly. A single solid color also makes the mesh structure easy to follow.
Choosing Yarn and Hook Size
For the intended lightweight fabric, start with a fine, smooth yarn and make a small swatch before committing to the full scarf. The aim is a triangle that bends comfortably around the head while retaining a visible mesh pattern.
If the fabric feels stiff, try a slightly larger hook. If the openings feel too loose or the stitches do not hold their shape, try a smaller hook. Changing the yarn or hook will change the size of each row and the amount of yarn required.
Avoid choosing a hook only because it appears in another bandana pattern. Hook size, yarn thickness, stitch pattern, and your own tension work together.
Stitches and Abbreviations
This pattern uses US crochet terminology.
| Abbreviation | Meaning |
|---|---|
| ch | chain |
| sc | single crochet |
| dc | double crochet |
| sl st | slip stitch |
| st / sts | stitch / stitches |
| ch-1 space | space beneath one chain |
Turning chain: The ch 3 at the start of each row counts as the first dc. When you reach the end of the next row, work into the top of that turning chain.
Working into a space: Insert your hook beneath the chain arch, rather than into the individual chain stitch.
Crochet Bandana Sizing and Gauge
The triangle has three important measurements:
- Top width: the longest edge, which lies across the head.
- Depth: the distance from the midpoint of the top edge to the bottom point.
- Tie length: the extension at each end of the top edge.
For an initial adult fitting trial, aim for a top width of approximately 40–46 cm and ties of 25–30 cm each. These are starting targets; check them on the intended wearer. The triangle should cover the desired area while leaving room for the ties to meet comfortably behind the head.
The depth depends on the proportions of your stitches. If the triangle reaches the right width but extends farther down the head than you want, stop and reassess the fabric before making the edging.
A washed gauge has not yet been recorded. Work the first several rows, measure the width and depth, and check that the developing shape matches the coverage you want. Gauge still matters, even when you are working to measurements.
Measure the fabric resting flat without pulling it. Recheck after washing and drying a test swatch before deciding on the finished size.
Free Crochet Bandana Pattern
Before You Begin
Work from the bottom point upward in turned rows. Each new mesh row adds one chain space at each side of the triangle. Do not fasten off after the final body row; continue with the ties and edging.
For a first sample, mark both row ends. Move the markers upward as you work so that the top of the turning chain remains easy to identify.
Row 1: Make the Starting Point
Ch 4 and join with a sl st into the first ch to form a small ring. Ch 3 (counts as the first dc), ch 1, then work 1 dc into the ring. Turn.
Row 1 count: 2 dc and 1 ch-1 space. If yours differs, check the turning chain before continuing. The foundation ring is not included in the count.
Row 2: Increase at Both Ends
Ch 3 (counts as the first dc), ch 1, then work 1 dc into the last dc made in Row 1, the stitch directly beneath the new turning chain. This creates the first increase.
Ch 1, skip the previous row’s ch-1 space, then work (dc, ch 1, dc) into the top of Row 1’s beginning ch-3, its third chain. This creates the second increase. Turn.
Row 2 count: 4 dc and 3 ch-1 spaces. If yours differs, check both ends before continuing.
Row 3: Establish the Body Repeat
Ch 3, ch 1, then work 1 dc into the last dc made in Row 2.
For each of the next two dc stitches: ch 1, skip the intervening ch-1 space, and work 1 dc into that dc.
Ch 1, skip the final ch-1 space, then work (dc, ch 1, dc) into the top of Row 2’s beginning ch-3. Turn.
Row 3 count: 6 dc and 5 ch-1 spaces. If yours differs, check both ends before continuing.
Row 4 and Following Rows: Repeat the Mesh
Ch 3, ch 1, then work 1 dc into the last dc made in the previous row.
Across the interior, repeat: ch 1, skip the next ch-1 space, dc into the next dc. Stop before the previous row’s beginning ch-3; do not work an ordinary repeat into that turning chain.
Ch 1, skip the final ch-1 space, then work (dc, ch 1, dc) into the third chain of the previous row’s beginning ch-3. Turn.
Row n count: 2 × n dc and (2 × n) − 1 ch-1 spaces, including the beginning ch-3 as a dc. Each row adds 2 dc and 2 spaces. Count after every row and check both ends if the totals differ.
| Body row | Dc, including turning chain | Ch-1 spaces |
|---|---|---|
| 1 | 2 | 1 |
| 2 | 4 | 3 |
| 3 | 6 | 5 |
| 4 | 8 | 7 |
| 5 | 10 | 9 |
| 6 | 12 | 11 |
Stop rule for the first adult fitting sample: Repeat until the top edge measures approximately 42 cm laid flat without stretching, before edging. Check coverage on the intended wearer; adjust within the initial 40–46 cm trial range if needed. A reliable row estimate requires a measured sample, so none is specified yet.
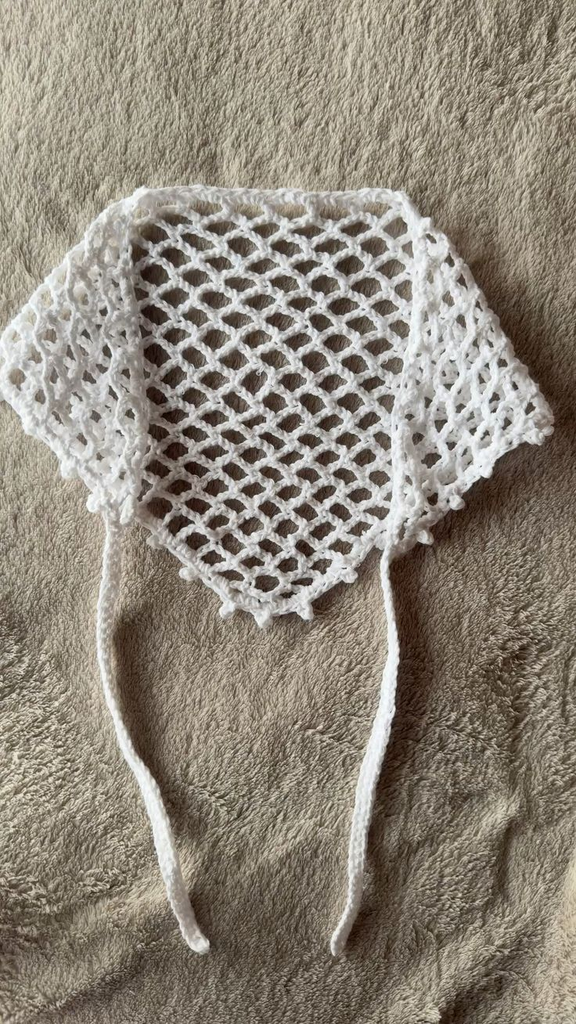
Add the First Tie
At the end of your final body row, do not fasten off.
Chain until the chain measures your preferred tie length without stretching. Begin with a 25–30 cm fitting trial, allowing for the chain to change slightly when slip stitches are added.
Sl st into the second ch from the hook and into each remaining ch back toward the triangle. Sl st into the same corner stitch to anchor the tie.
Try the returned tie for comfort before making the second one. Avoid tightening the slip stitches so much that the tie becomes rigid.
Edge the Top and Add the Second Tie
Work back across the top edge with 1 sc into each dc and 1 sc into each ch-1 space. Include the turning-chain top as a stitch.
At the opposite corner, make a second tie in the same way as the first: chain to the matching length, then slip stitch back along the chain and anchor it at the corner.
Finish the Sloping Edges
Continue around the first sloping side, placing approximately 2 sc around each dc row end as a starting point.
At the bottom point, work (sc, ch 1, sc) into the foundation point. Continue up the other sloping side, spacing the sc to match the first side.
Join to the edging with a sl st, fasten off, and weave in the ends.
Pause regularly and lay the triangle flat. If the border ruffles, use fewer stitches around the row ends. If it draws the sides inward, add stitches or loosen your tension. The correct distribution depends on the height of your rows.
Check the Fit Before Finishing
Place the long edge across your head and let the point fall toward the back. Bring both ties behind your head and tie them gently.
Check that the forehead edge sits comfortably, the triangle gives the coverage you want, and the ties are long enough to knot without pulling the fabric tight.
If the scarf body is too wide, remove body rows and remake the edging. If it is too narrow, add body rows before edging. Longer ties can help with fastening, but they do not replace missing fabric coverage.
Washing and Blocking
Follow the care instructions on your yarn label. For a first sample, check a washed swatch before washing the finished bandana.
Gently arrange the damp triangle on a flat surface and straighten the ties. Shape it without stretching the mesh aggressively, then allow it to dry fully before checking the fit again.
Record the finished measurements after drying. Those measurements are more useful for future versions than a row count alone.
How to Wear Your Crochet Hair Bandana
Classic: Place the long edge across your head, let the point fall behind, and knot the ties under your hair.
Over a bun: Position the triangle over your hair and bring the ties together above the bun. Adjust the knot so it sits comfortably.
Folded: Fold the triangle into a narrow strip and tie it at the back for a headband look.
Neck scarf: Drape the triangle around your neck and tie it loosely at the front. Check the fit without pulling on the ties.
Make the Crochet Hair Bandana Your Own
Choose a single soft color. Cream, sage green, dusty pink, and light blue keep the stitch pattern visible and pair easily with everyday clothing.
Change the coverage. Work fewer body rows for a smaller scarf or more rows for a larger triangle, checking both width and depth as you go.
Add a contrasting border. A different edging color changes the appearance without changing the body construction.
Adjust the ties. Make longer ties if you prefer a bow, and check the required length on the wearer before fastening off.
Try one change at a time on your first sample so that you can see how it affects fit and fabric.
Troubleshooting Your Crochet Bandana
Why Is My Triangle Uneven?
Check that you have worked the increase at both row ends and included the turning-chain top. Count the ch-1 spaces: after Row 1, each new body row should add two spaces.
Why Is the Top Edge Too Tight?
The single crochet edging may be tighter than the mesh. Work the edging more loosely or try a slightly larger hook for that section, then check the fit again.
Why Does the Border Ripple?
There may be too many edging stitches along the sloping sides. Remove a short section and try fewer stitches, checking the triangle flat as you work.
Why Are My Ties Curling?
Check whether your return slip stitches are much tighter than the starting chain. Loosen that return pass and assess the tie again after gentle shaping.
Frequently Asked Questions
How Do You Crochet a Bandana?
In this design, you start at the bottom point and increase at both sides of a mesh triangle. Once the long edge reaches your preferred width, you add ties and a narrow border.
Can I Make This Crochet Bandana Smaller?
Yes. Stop the body repeat earlier and check the fit before edging. Adjust the ties separately. This draft does not include tested child sizing.
How Much Yarn Does a Crochet Bandana Need?
The amount depends on yarn thickness, hook size, triangle size, and tie length. Have about 200 m available for the initial sport-weight sample; this is a supply allowance, not a verified consumption figure.
Can I Use a Different Yarn Weight?
You can experiment, but it changes the fabric, measurements, and yarn usage. Make a swatch and work to the desired dimensions instead of copying another sample’s row count.
Does This Pattern Use US or UK Terms?
It uses US terms. US double crochet corresponds to UK treble crochet, and US single crochet corresponds to UK double crochet.
Is This a Tested Free Crochet Bandana Pattern?
No. Physical testing is still required; the measurements and yarn allowance are provisional.
How Long Does a Crochet Bandana Take to Make?
That depends on your crochet speed, the size, and how often you stop to check the pattern. No completion time has been measured for this draft. Plan time for a swatch, fitting, and finishing as well as the body rows.
What Is the Best Yarn for a Crochet Bandana?
A smooth, lightweight cotton is a useful starting choice for a summer version: it makes the stitches easy to see and can produce a breathable, open fabric. Check the swatch against your skin and follow the yarn label for care. Yarn thickness and stitch density also affect comfort.
How Do I Stop a Crochet Bandana from Slipping?
Check that the top edge follows the curve of your head and the ties form a secure, comfortable knot. Try knotting under your hair or changing where the bandana sits. If needed, secure the edge with hairpins rather than pulling the ties excessively tight.
Can I Wash a Crochet Bandana?
Follow the yarn label. Test the care method on a swatch, then reshape the bandana and let it dry as directed. Recheck its dimensions after drying.
How Do I Make It Bigger or Smaller?
Add body rows for a wider, deeper triangle or stop sooner for less coverage. Adjust tie length separately, and check fit before edging. Changing the width will also change the depth.https://easycrochet.com/crochet-bandana-patterns/
More Crochet Accessories from InfoCrochet
For another wearable project, explore our free crochet headband patterns.
Save this free crochet bandana pattern for your next small project. Start with a smooth yarn, check the developing triangle often, and adjust the body and ties to suit the way you want to wear it.
Save this pattern: Pin it to your crochet accessories board so you can find the instructions again.


