

Easy Crochet Headband Pattern Free – 7 Simple Steps

Easy Crochet Headband Pattern Free – Step-by-Step for Beginners
Looking for an easy crochet headband pattern? This free crochet headband pattern is designed for beginners who want to create a cozy, stylish accessory using simple stitches.
Follow the seven easy steps below to make your own twisted crochet headband. You’ll learn how to create a ribbed texture, adjust the size, and sew the ends together for a beautiful handmade finish.
This crochet headband pattern free tutorial walks you through the basic stitches, ribbed texture, and twisted seam. It’s a beginner-friendly project you can customize with your favorite yarn colors.
Why You’ll Love This Crochet Headband
- Beginner-friendly single crochet stitches
- Beautiful ribbed texture
- Twisted front detail
- Adjustable width and circumference
- Easy to customize with different colors
- A practical handmade gift for cooler weather
Materials You’ll Need
- Worsted-weight yarn (category 4)
- 5.0 mm (H/8) crochet hook
- Yarn needle
- Scissors
- Measuring tape
- Stitch markers (optional)
Skill level: Beginner
Terminology: US crochet terms
Estimated yarn requirement: 60–100 yards, subject to testing.https://www.craftyarncouncil.com/.

Crochet Headband Gauge
Gauge is important because it helps determine how long and wide your finished headband will be.
Gauge: ___ stitches and ___ rows in back-loop-only single crochet = 4 × 4 inches (10 × 10 cm).
To check your gauge:
- Crochet a small sample using your chosen yarn and hook.
- Work several rows in back-loop-only single crochet.
- Measure a 4-inch section in both directions.
- Count the stitches and rows.
- Adjust your hook size if necessary.
Important: For this sideways construction, the number of rows determines the headband circumference, while the number of stitches determines its width.
Measure your swatch in the same orientation as the finished headband.
Crochet Headband Size Chart
| Size | Starting chain | Rows | Target length |
|---|---|---|---|
| Child | 16 | To test | 17–18 in |
| Teen | 16 | To test | 18–19 in |
| Adult Small | 16 | To test | 19–20 in |
| Adult Large | 16 | To test | 20–21 in |
These lengths are preliminary estimates. Actual sizing depends on yarn stretch, gauge, and fit.
How to calculate the number of rows:
Required rows = Target length (in inches) × Rows per inch
For example, if your tested gauge is 8 rows per 4 inches, you have 2 rows per inch. A 19-inch rectangle would require approximately 38 rows.
This is only a calculation example, not the verified gauge for this pattern.
How to Crochet a Twisted Headband
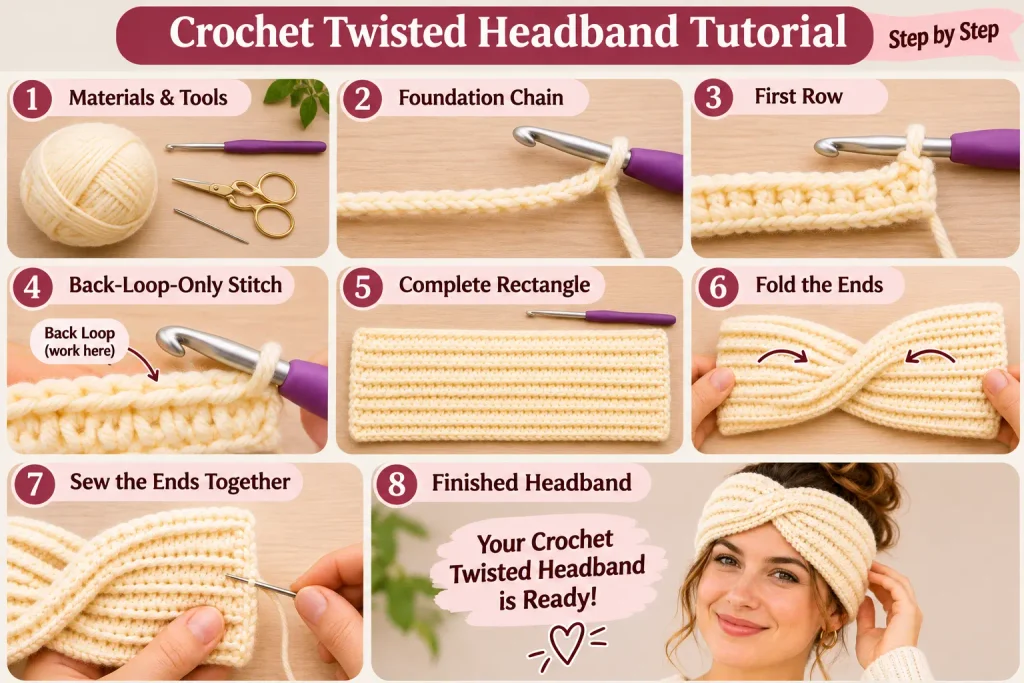
Step 1: Create the Foundation Chain
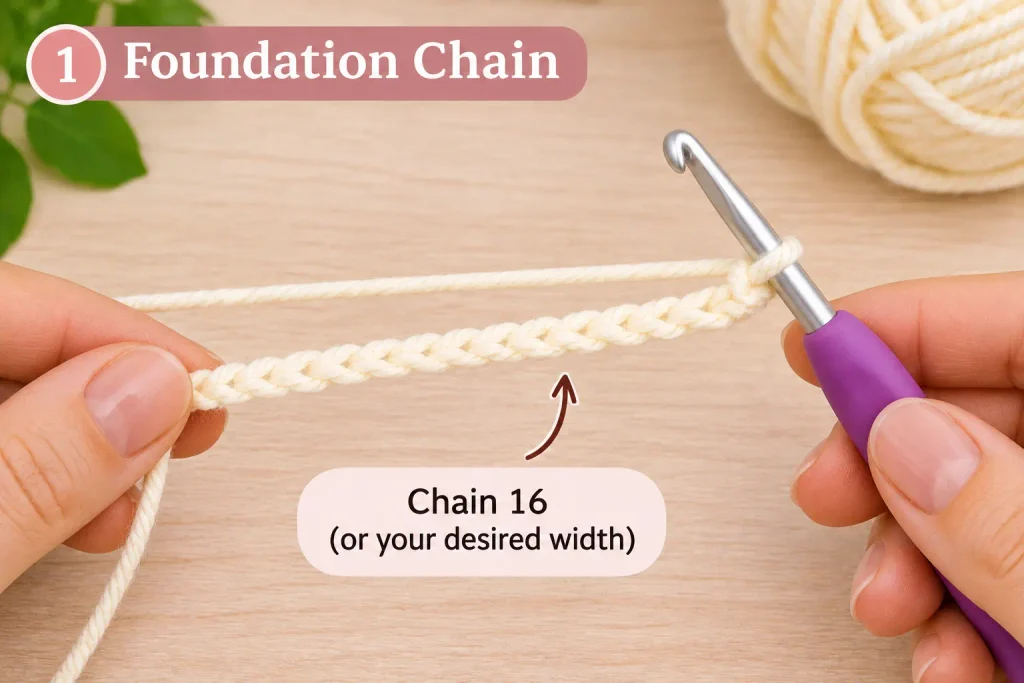
Make a slip knot and chain 16.
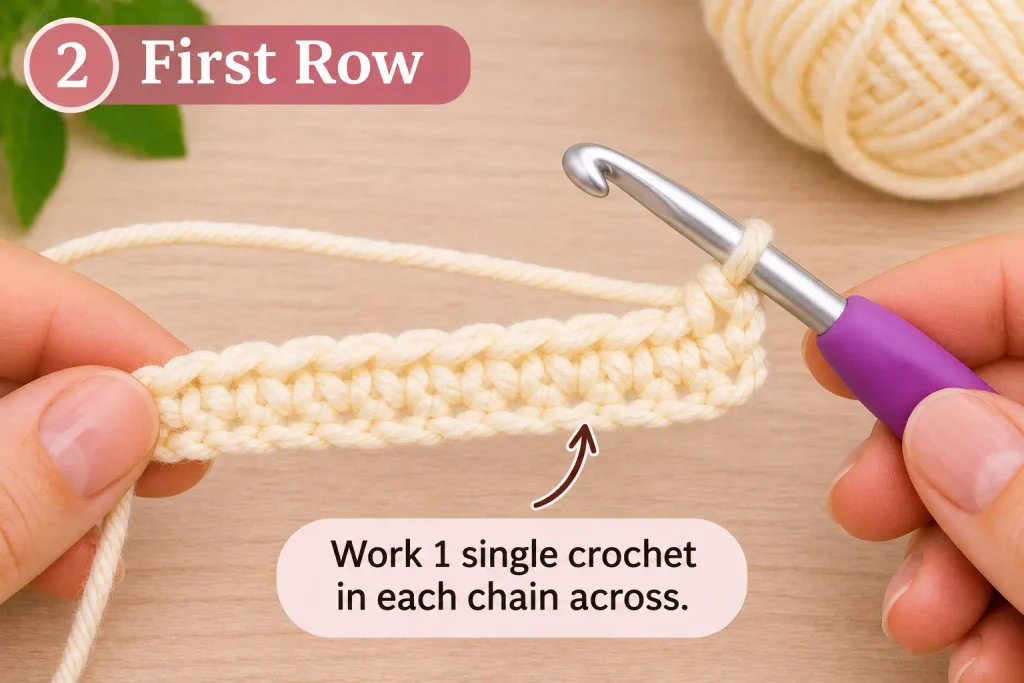
Insert your hook into the second chain from the hook and work one single crochet into each chain across.
You should have 15 single crochet stitches.
Chain 1 and turn.
Photo 1: Foundation chain and first row.
Step 2: Work in the Back Loop Only
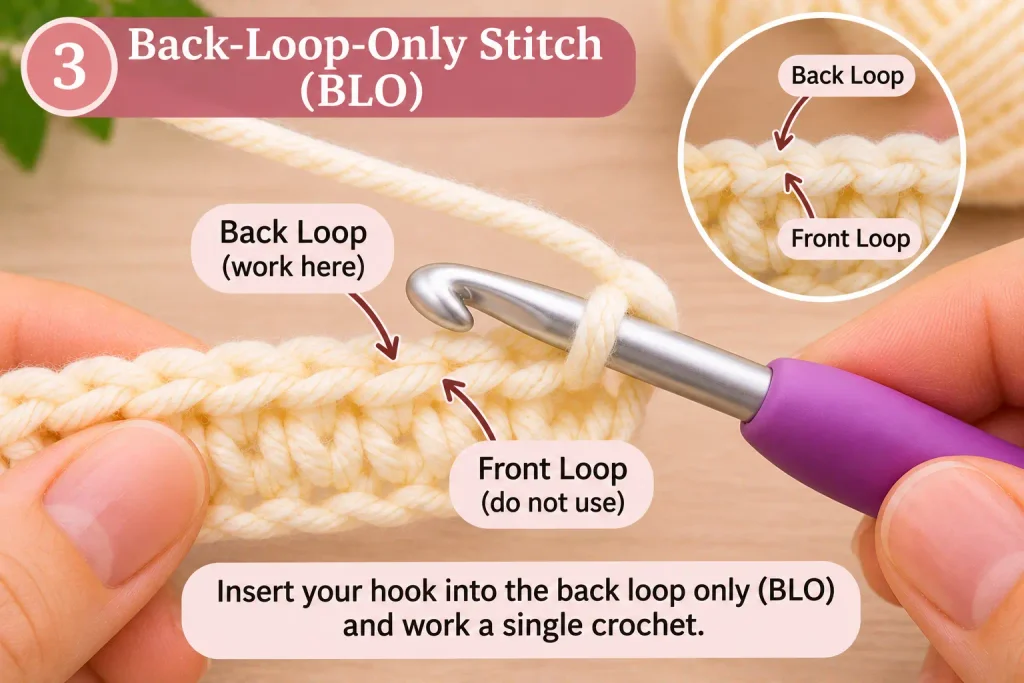
Insert your hook into the back loop of the first stitch.
Work one single crochet in the back loop of each stitch across.
Chain 1 and turn.
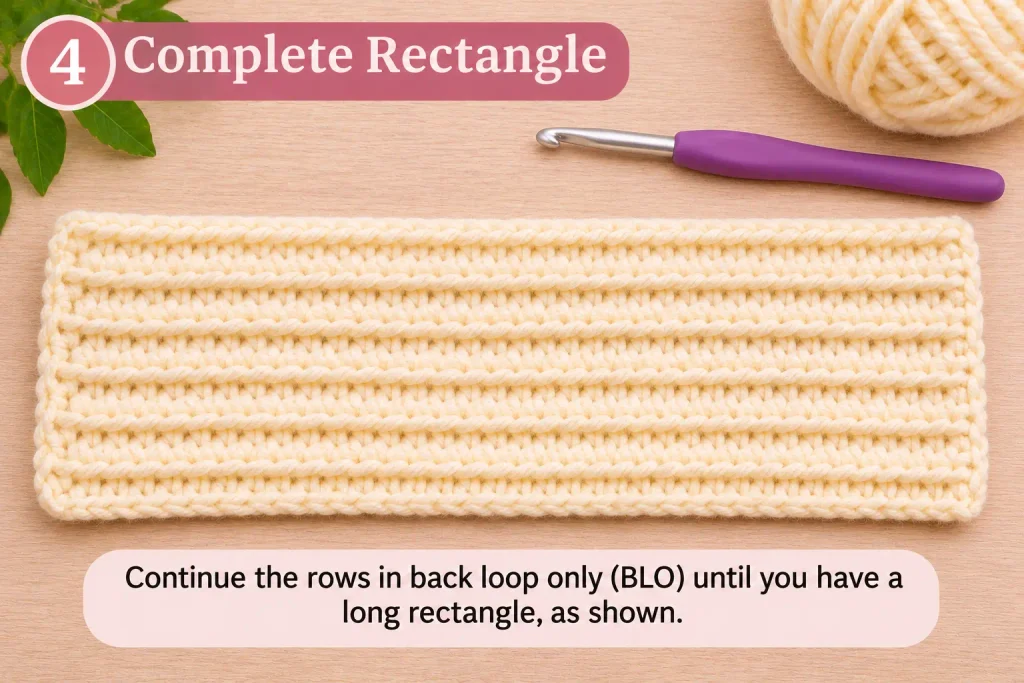
Repeat this row to develop the ribbed texture.
Photo 2: Close-up showing which loop to insert the hook into.
Photo 3: Several completed rows showing the ribbed texture.
Step 3: Continue Crocheting the Rectangle
If you’re new to crochet, take your time when working in the back loop only. This technique creates the beautiful ribbed texture that makes your crochet headband soft and flexible.
Try to maintain even tension and count your stitches after every row. This will help keep your headband straight and make the twisted finish easier to assemble.
Photo 4: Completed rectangle laid flat beside a measuring tape.
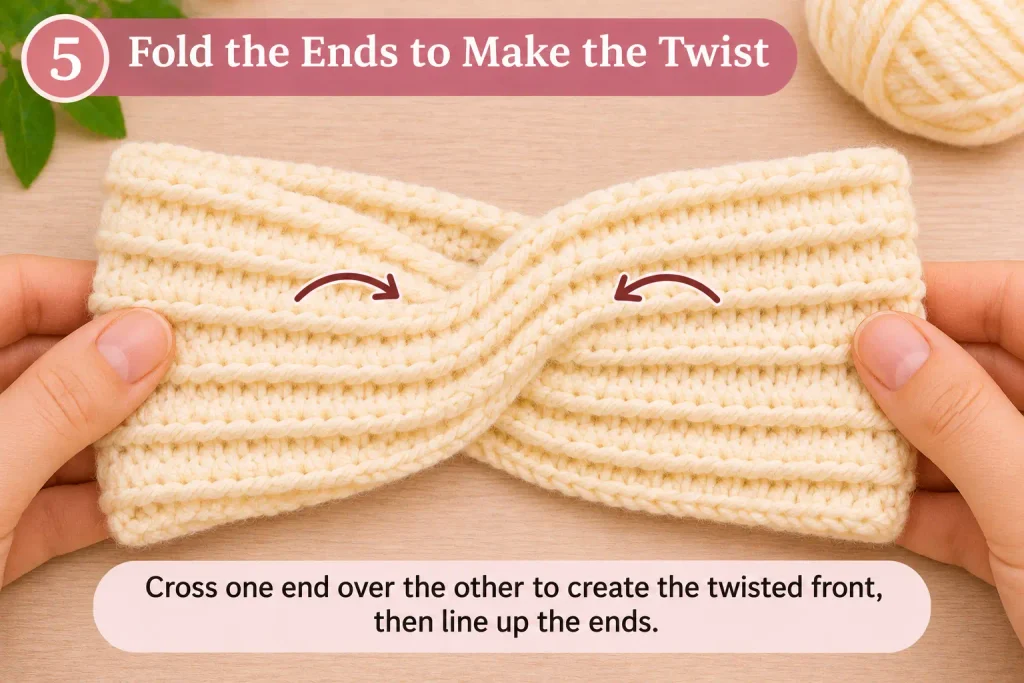
Step 4: Prepare the Twisted Seam
Lay your crochet rectangle flat.
Bring the short ends together.
Fold each short end lengthwise into a U shape.
Interlock the folded ends so the four fabric layers alternate.
The arrangement should resemble four layers stacked together.
Photo 5: First short end folded into a U shape.
Photo 6: Second short end folded.
Photo 7: Four interlocked layers before sewing.
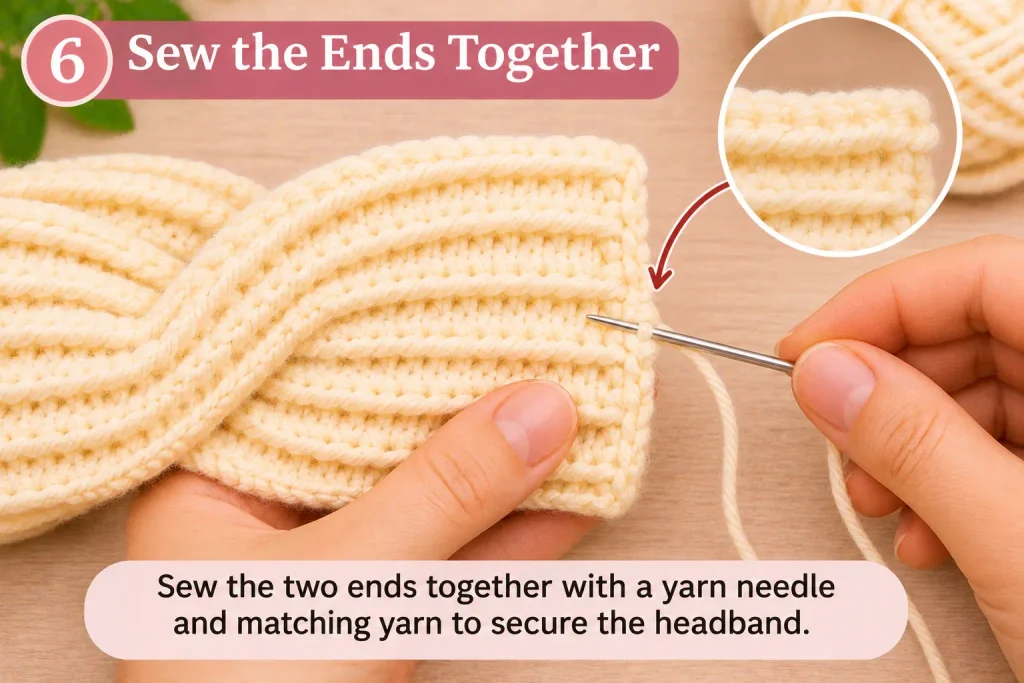
Step 5: Sew the Twist
Thread your yarn needle with the long yarn tail.
Sew securely through all four layers along the folded edge.
Check that every layer is included in the seam.
Fasten off and weave in the yarn ends.
Photo 8: Close-up of the sewing process.
Step 6: Reveal Your Finished Headband
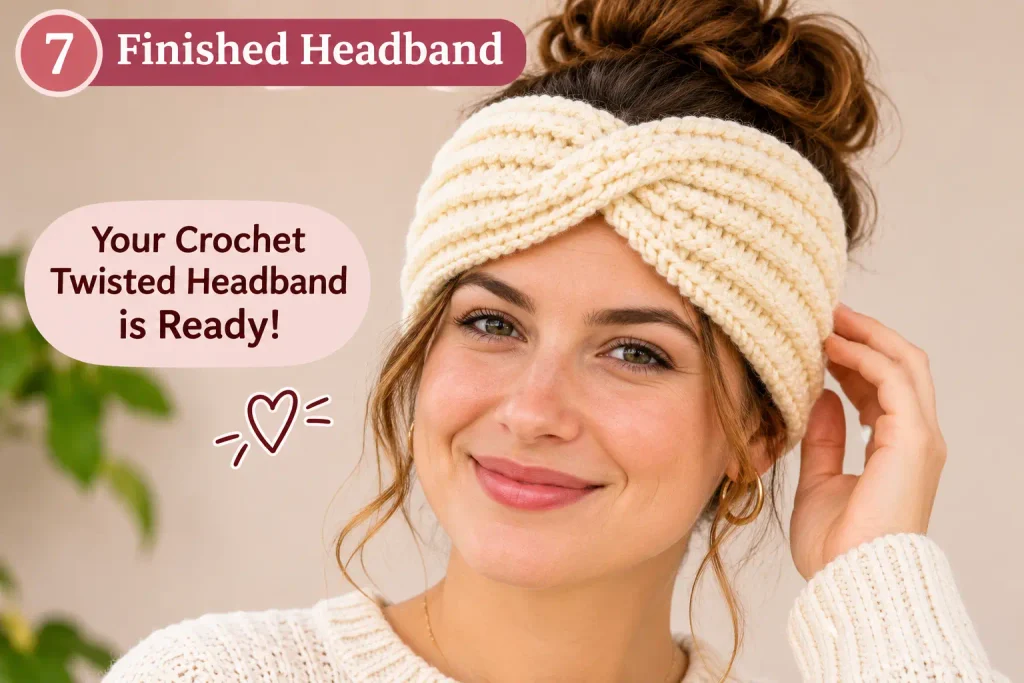
Turn the headband right side out.
Gently arrange the twisted section at the front.
Try on the headband and check that it fits comfortably.
Photo 9: Finished headband laid flat.
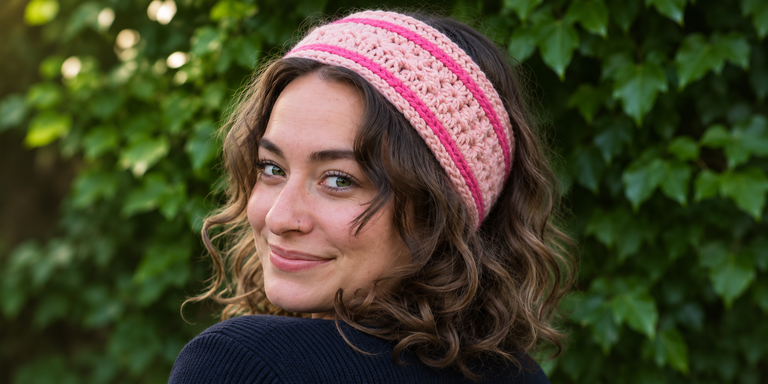
Photo 10: Finished crochet headband worn on a model.
My Crochet Headband Making Notes
Complete this section after making and testing the sample.
For this crochet headband, I used ___ yarn in the color ___ with a ___ mm crochet hook.
The finished project took approximately ___ hours and required ___ yards of yarn.
The finished headband measured ___ inches around and ___ inches wide.
After trying it on, I found that ___.
One thing I would recommend to beginners is ___.
These details will help readers understand what to expect from the finished project.
Crochet Headband Troubleshooting
Why Is My Crochet Headband Too Tight?
Your headband may be too short or your yarn may not stretch enough.
Before joining the ends, check the rectangle against your head measurement. Add more rows if needed.
If your stitches are unusually tight, consider trying a slightly larger hook and checking your gauge again.
Why Is My Crochet Headband Too Loose?
If the finished headband slips down, the rectangle may be too long.
Before sewing, check the fit and remove rows if necessary.
Different yarn fibers have different levels of elasticity, so the same measurements may not produce the same fit.
Why Does My Crochet Twist Look Bulky?
A bulky twist can happen when the folded ends are not aligned or when the yarn is especially thick.
Make sure all four layers are neatly interlocked before sewing.
Use small, secure stitches and avoid gathering the seam more tightly than necessary.
Why Are My Crochet Headband Edges Uneven?
Uneven edges often happen when stitches are accidentally added or skipped.
Count your stitches at the end of every row.
For this sample, maintain 15 single crochet stitches per row.
Why Is My Headband Curling?
Some curling can occur because of stitch tension or the natural structure of the fabric.
Try relaxing your tension and gently laying the finished piece flat.
If appropriate for your yarn, light blocking may help the fabric settle.
How to Wash and Care for Your Crochet Headband
Proper care helps your handmade headband maintain its shape and texture.
Washing
Always check the yarn manufacturer’s care label first.
For yarns suitable for handwashing, use cool water and a gentle detergent.
Avoid vigorous rubbing or twisting, which can distort the stitches.
Drying
Gently press out excess water without wringing.
Lay the headband flat on a clean towel and reshape it while damp.
Allow it to dry completely before wearing or storing.
Storing
Store your crochet headband in a clean, dry place.
Avoid hanging it for long periods if the yarn stretches easily.
Four Ways to Customize Your Crochet Headband
1. Wide Crochet Ear Warmer
Add more foundation chains to create a wider headband that covers more of your ears.
This is a cozy option for autumn and winter.
2. Classic Crochet Headband Without a Twist
Skip the twisted fold and join the short ends with a simple flat seam.
This creates a clean, minimal design.
3. Crochet Headband With a Button Closure
Instead of sewing the ends together permanently, create an appropriately sized buttonhole and attach a secure button.
Test the closure before wearing.
4. Two-Color Crochet Headband
Alternate yarn colors between sections to create stripes.
Choose complementary shades such as cream and sage green or dusty pink and beige.
Is This Crochet Headband a Good Handmade Gift?
A crochet headband makes a thoughtful handmade gift for friends, family members, teachers, and crochet lovers.
Choose soft yarn and a color that matches the recipient’s style.
You can package the finished headband with a small handmade gift tag.
Once you’ve practiced the pattern, it may become a convenient project for holiday gifts, birthdays, and craft fairs.
Free Printable Crochet Headband Pattern PDF
Want to keep the instructions handy while crocheting?
A printable version of this beginner crochet headband pattern is planned for InfoCrochet.
[Download the Free Crochet Headband Pattern PDF – Coming Soon]
The printable PDF will include:
- Materials and tools
- Stitch abbreviations
- Tested gauge and sizing chart
- Step-by-step written instructions
- Twisted seam photo guide
- Care instructions
The PDF should be released only after the pattern has been tested and the measurements verified.
Save This Crochet Headband Pattern for Later
Love this easy crochet headband idea?
Save this tutorial to your favorite Pinterest crochet board so you can find it when you’re ready to start your next handmade project.
Suggested Pinterest pin title:
Easy Crochet Headband Pattern FREE – Beginner Tutorial
Text on the Pinterest image:
EASY CROCHET HEADBAND
FREE PATTERN
More Crochet Inspiration
Explore more handmade crochet ideas on InfoCrochet:
Once additional relevant tutorials are published, link to beginner crochet stitches, yarn selection guides, and other headband patterns.
Final Thoughts
Learning how to crochet a headband is a wonderful way to practice basic stitches while making something practical and stylish.
This easy crochet headband pattern uses a ribbed rectangle and twisted seam to create a cozy handmade accessory.
Choose your favorite yarn, experiment with different colors, and enjoy creating your own crochet headband.
Happy crocheting!



3 Comments
Comments are closed.