Crochet Flower Headband Pattern – 5 Easy Steps

Crochet Flower Headband Pattern Free – 5 Easy Steps for Beginners
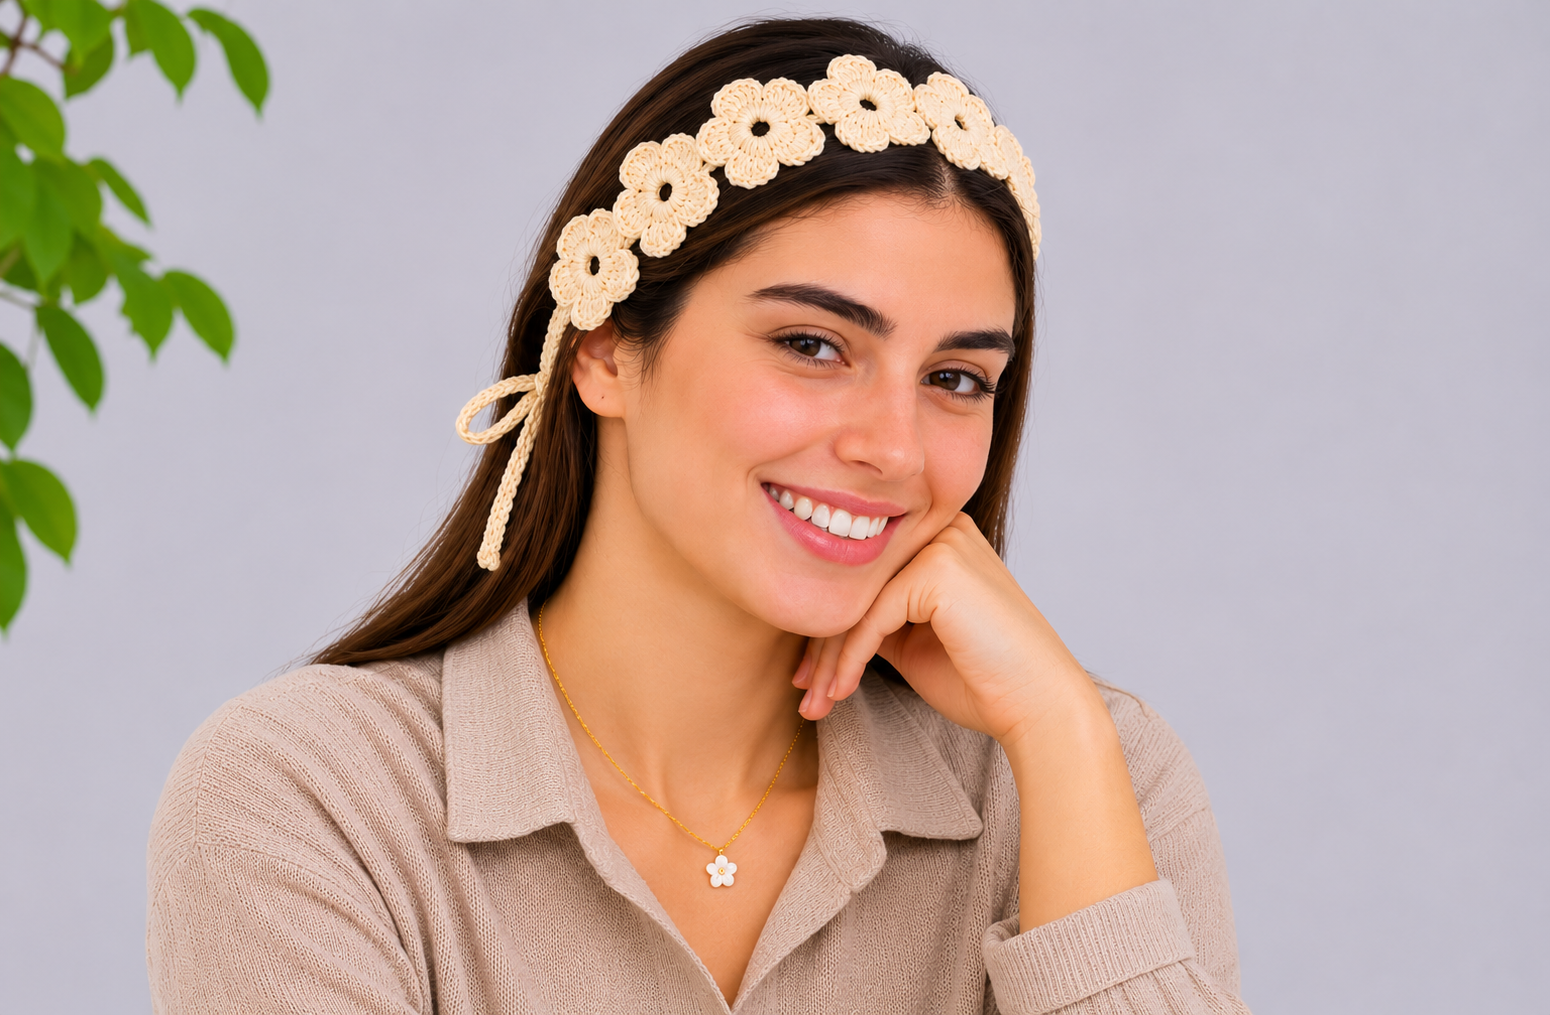
Looking for a beautiful free crochet flower headband pattern? This beginner-friendly tutorial shows you how to make a charming floral headband using simple crochet stitches and soft cotton yarn.
In five easy steps, you’ll learn how to crochet five-petal flowers, join them into a decorative band, and add adjustable ties for a comfortable fit.
Whether you prefer creamy white, dusty pink, or chocolate brown, this handmade flower headband is a lovely accessory for spring and summer outfits. It’s also a thoughtful handmade gift for friends and family.
With a crochet hook, a little yarn, and a few basic techniques, you can create a floral accessory in your favorite colors.
Why You’ll Love This Crochet Flower Headband
This crochet flower headband combines delicate floral motifs with a simple, adjustable design.
- Beginner-friendly: Uses basic crochet stitches.
- Adjustable fit: Tie the headband comfortably behind your head.
- Customizable colors: Make cream, pink, brown, or multicolored flowers.
- Lightweight design: A lovely accessory for spring and summer.
- Versatile style: Wear it with dresses, casual outfits, or bohemian-inspired clothing.
- Handmade gift idea: A thoughtful accessory for birthdays and special occasions.
Crochet Flower Headband Pattern at a Glance
| Detail | Information |
|---|---|
| Skill level | Beginner |
| Yarn | Category 3 cotton |
| Crochet hook | 3.5 mm |
| Main stitches | Chain, slip stitch, single crochet, double crochet |
| Construction | Joined five-petal flower motifs |
| Closure | Adjustable crochet ties or ribbon |
| Crochet terminology | US |
Materials You’ll Need
Before starting your crochet flower headband pattern, gather the following supplies:
- Lightweight category 3 cotton yarn
- 3.5 mm crochet hook
- Yarn needle
- Scissors
- Measuring tape
- Stitch markers (optional)
- Soft ribbon or cord (optional)
What Is the Best Yarn for a Crochet Flower Headband?
Soft cotton yarn is a practical choice for a lightweight crochet flower headband because it helps create defined stitches and comfortable flower motifs.
For a romantic look, choose dusty pink or creamy white. For a vintage-inspired accessory, try chocolate brown or warm beige.
You can also combine several yarn colors to create a unique floral design.
If you’re unsure about yarn thickness, the Craft Yarn Council yarn weight chart explains common yarn categories and suggested hook sizes.
Crochet Stitches and Abbreviations
This pattern uses four basic crochet stitches.
| Abbreviation | Meaning |
|---|---|
| ch | Chain |
| sl st | Slip stitch |
| sc | Single crochet |
| dc | Double crochet |
All instructions use US crochet terminology.
How to Crochet a Flower Headband – 5 Easy Steps
This free crochet flower headband pattern is made by crocheting individual flower motifs, joining them into a strip, and adding ties at both ends.
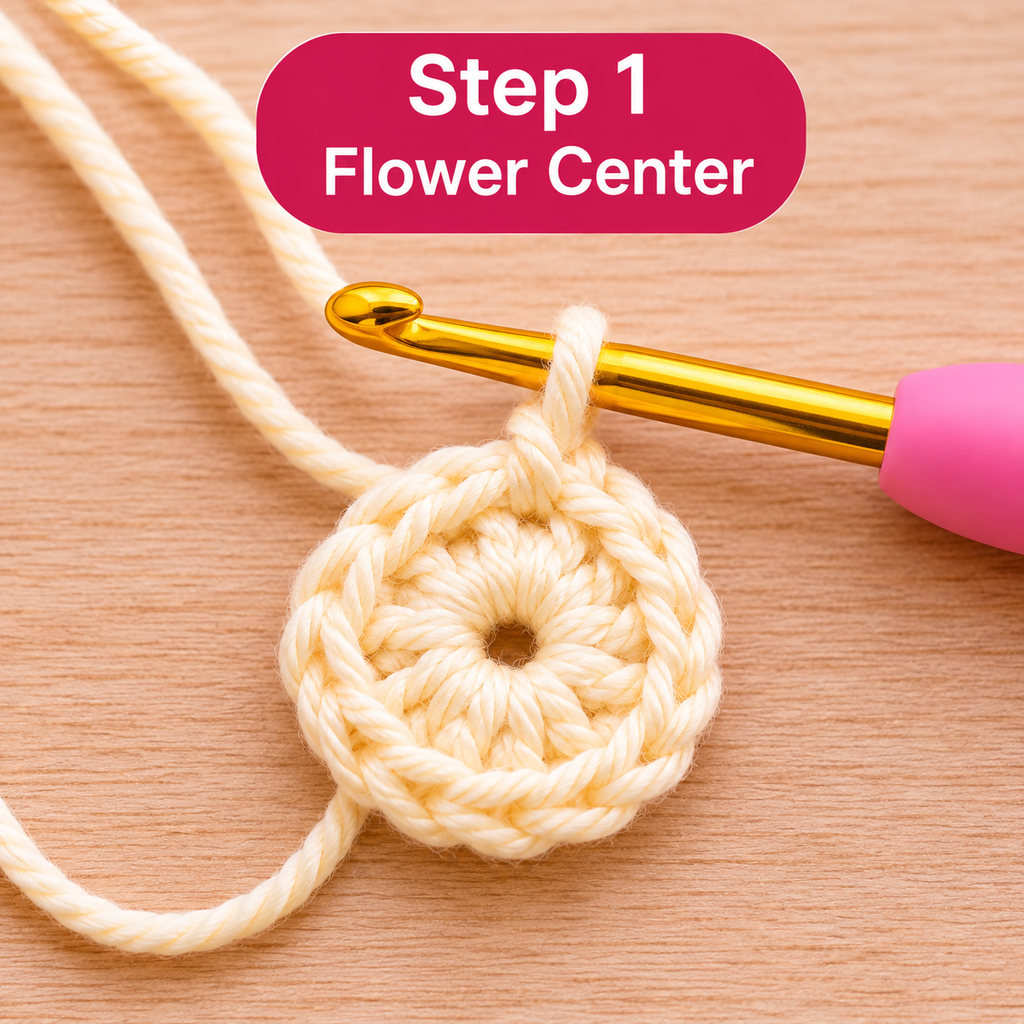
Step 1: Crochet the Flower Center
Start by making a slip knot.
Round 1:
- Chain 4.
- Join with a slip stitch into the first chain to form a ring.
- Chain 1.
- Work 10 single crochet stitches into the center of the ring.
- Join with a slip stitch into the first single crochet.
You should now have a small circular center containing 10 single crochet stitches.
Beginner tip: Keep your stitches even and avoid pulling the center ring too tightly.
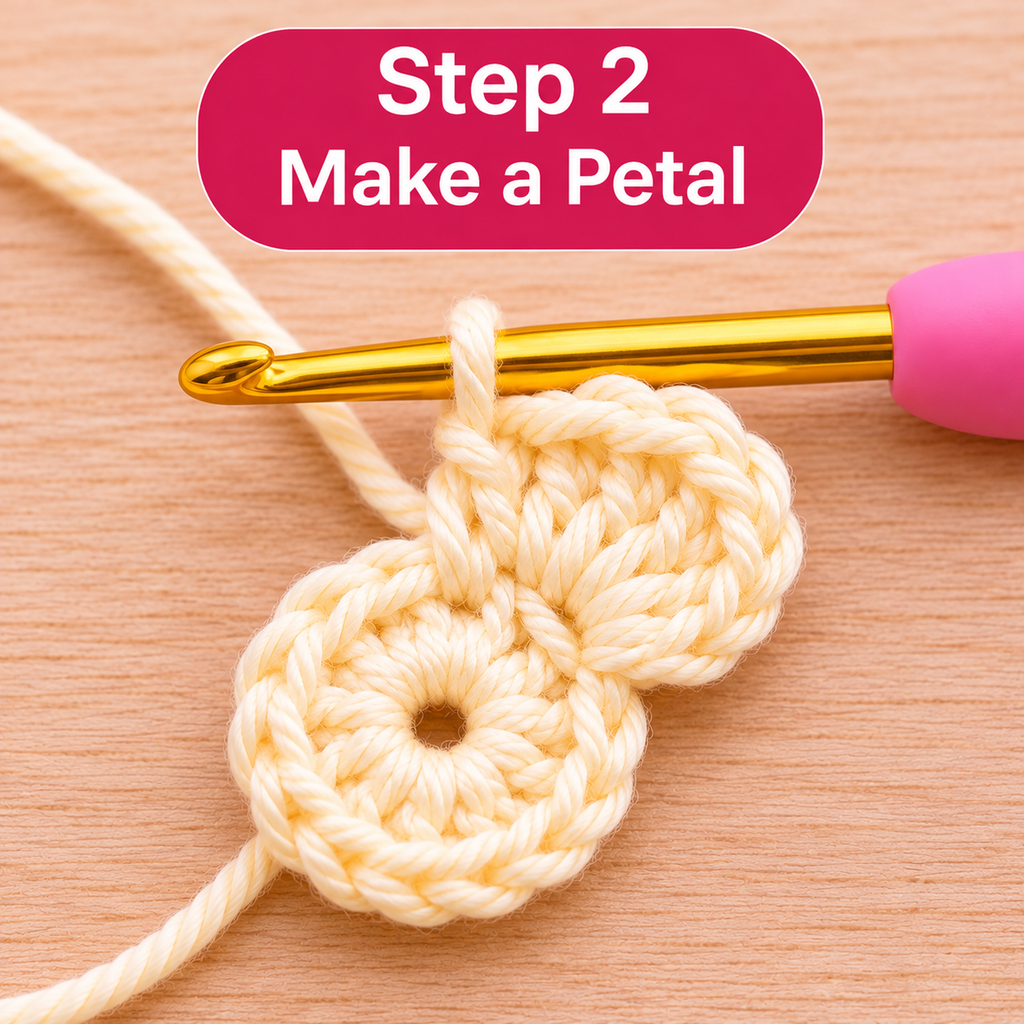
Step 2: Crochet the Five Flower Petals
Now you’ll create five petals around the flower center.
Round 2 – Petals
Repeat the following sequence five times:
- Slip stitch into the next stitch.
- In the following stitch, work: chain 2, 3 double crochet stitches, chain 2, and slip stitch.
Continue until you’ve completed five petals and used all 10 stitches from the center round.
Fasten off and weave in the yarn ends.
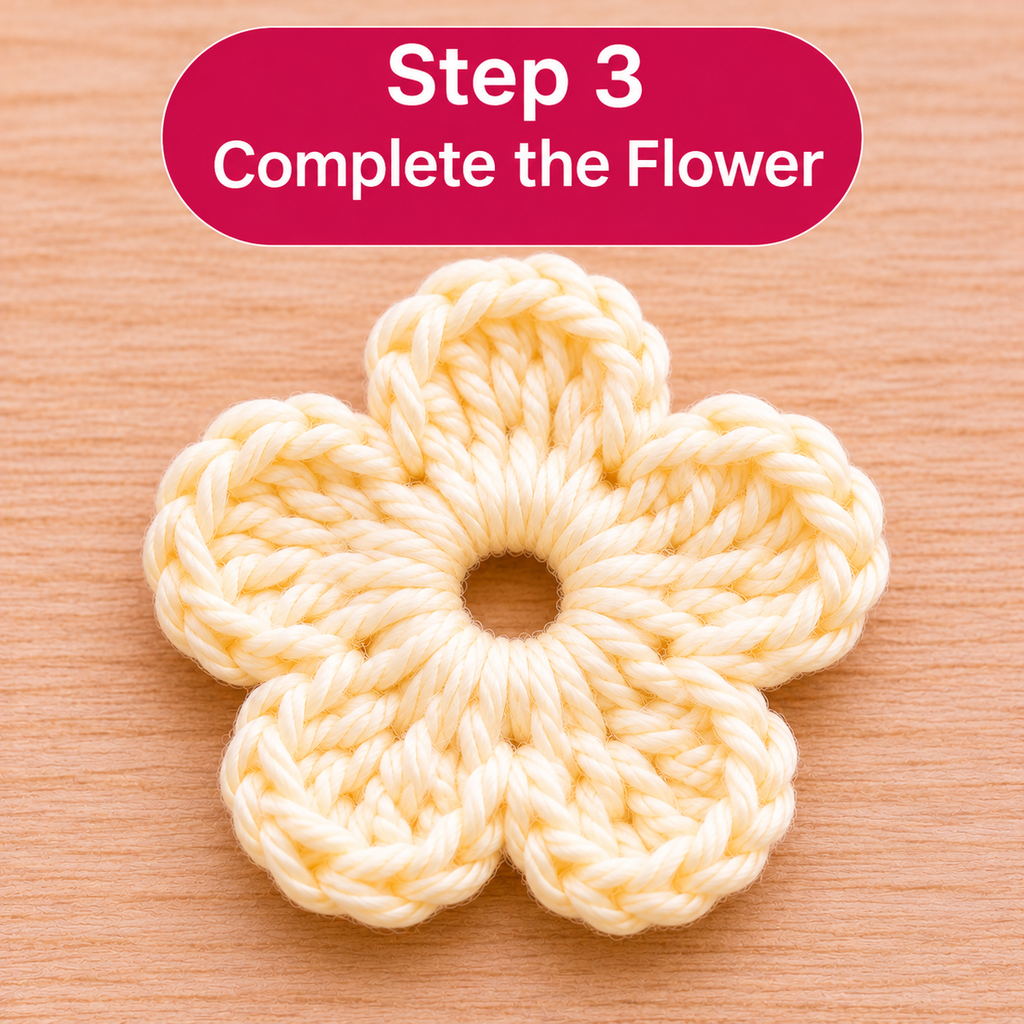
You should now have a small five-petal crochet flower.
Beginner tip: Keep your tension consistent so the petals have a similar shape and size.
Step 3: Crochet More Flower Motifs
Repeat Steps 1 and 2 to create additional flowers.
As a starting point, make six flower motifs for an adult headband.
Arrange the flowers in a straight line and check the total length.
The number of flowers depends on their finished size and how much of the front of your head you want the decorative section to cover.
Beginner tip: Use the same yarn and hook size for every flower to maintain a consistent appearance.
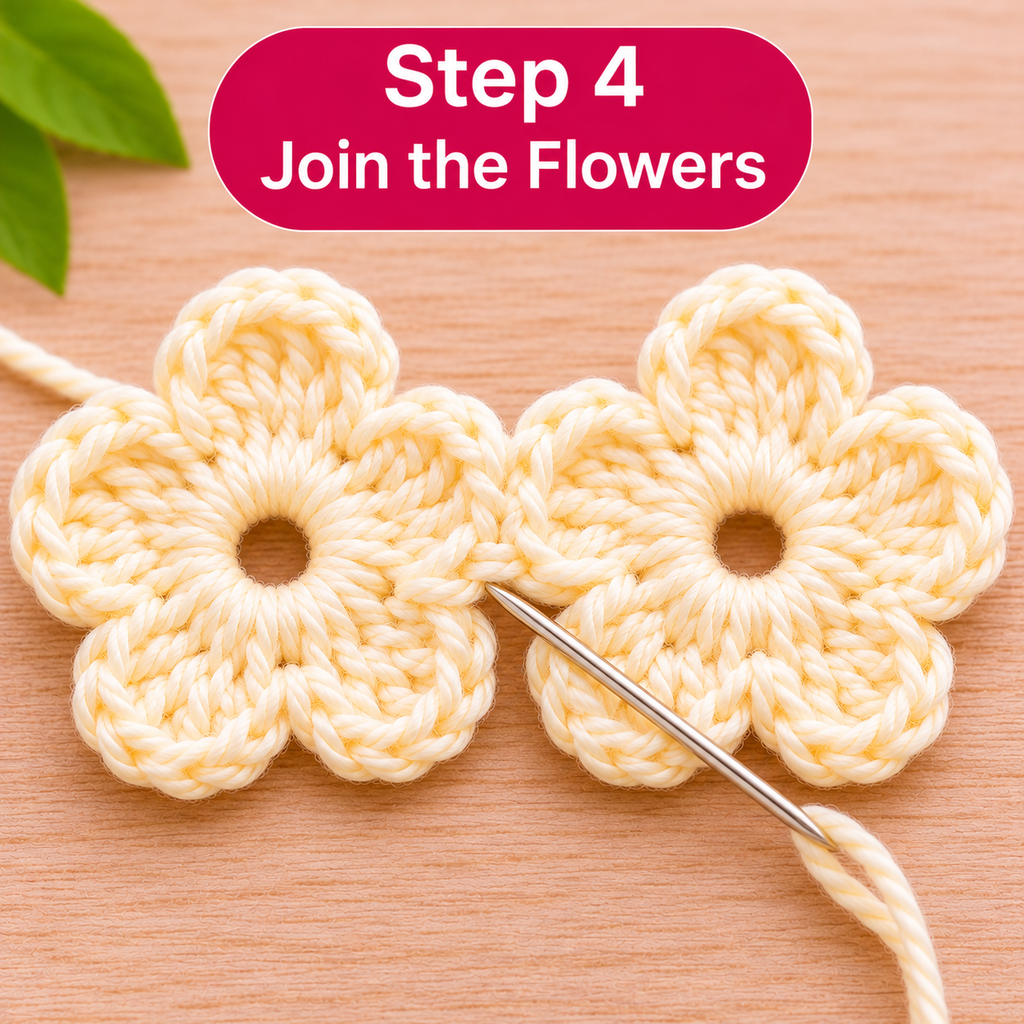
Step 4: Join the Crochet Flowers Together
Place two crochet flowers side by side so that two petals from each flower touch.
Thread your yarn needle with matching yarn.
Stitch through the tips of the first pair of touching petals two or three times, then repeat with the second pair.
Fasten off securely and repeat with the remaining flowers until you have a connected floral strip.
Lay the strip flat to check that the flowers sit evenly and do not twist.
Beginner tip: Keep your joining stitches secure but not overly tight. This helps the flowers maintain their shape.
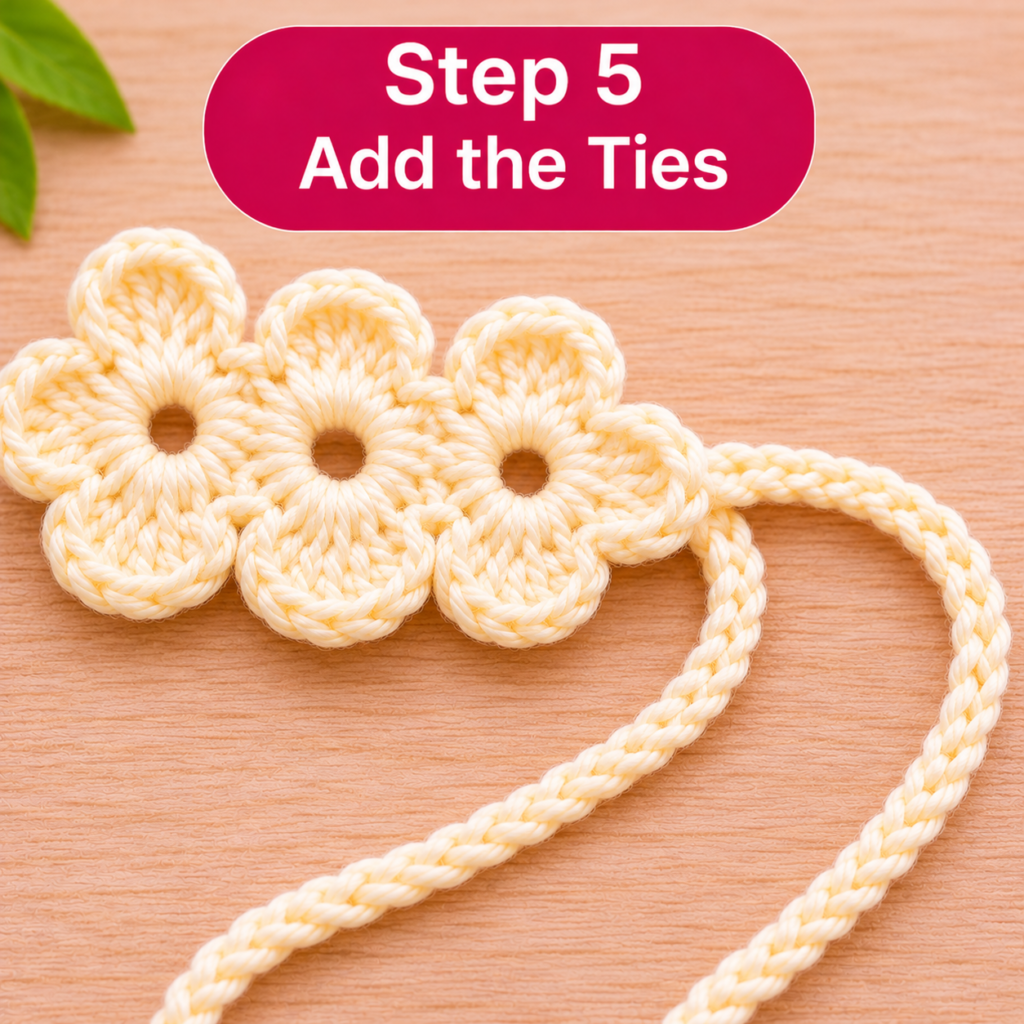
Step 5: Add Adjustable Crochet Ties
Attach your yarn to the outer edge of the first flower.
Chain approximately 45–60 stitches as a starting point for the first tie.
Fasten off securely.
Repeat on the opposite end of the flower strip.
Try the headband on and check whether the ties are long enough to fasten comfortably behind your head.
Add or remove chains as needed.
For stronger ties, work slip stitches back along the chain.
Step 6: Finish Your Crochet Flower Headband
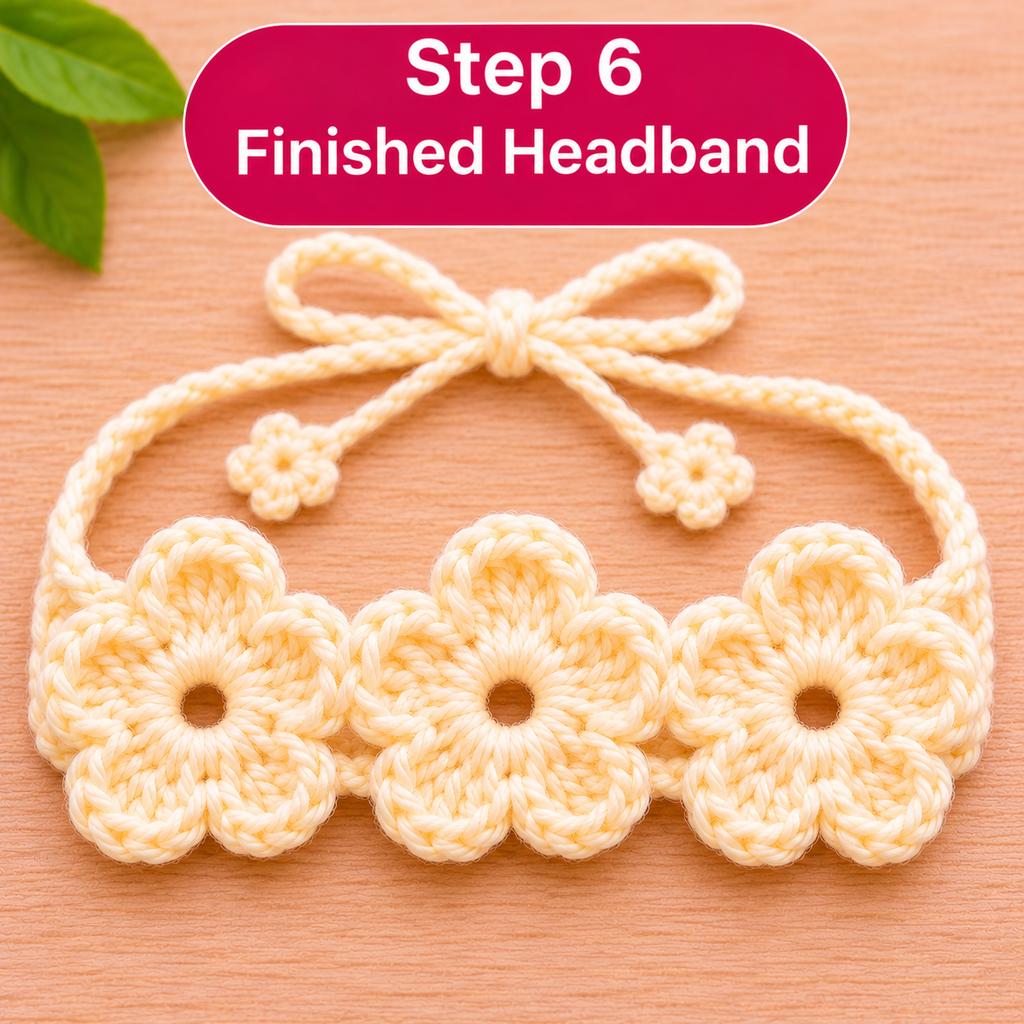
Now that your crochet flowers are joined and the adjustable ties are attached, it’s time to finish your beautiful handmade headband! Gently weave in any remaining yarn ends using a yarn needle, making sure all stitches are secure. Lay your crochet flower headband flat and carefully arrange the petals to create a neat, even shape. Try it on and tie the cords comfortably at the back of your head, adjusting the fit as needed. Your crochet flower headband is now complete! This lovely floral accessory is perfect for spring and summer outfits, handmade gifts, or adding a charming boho touch to your everyday style.
Alternative: Add Ribbon Ties to Your Crochet Flower Headband
Prefer not to crochet long chains? You can use ribbon or soft cord instead.
Cut two pieces of ribbon, approximately 20 inches (50 cm) each, as a starting length.
Securely sew one ribbon to each end of your crochet flower strip.
Place the headband on your head and tie the ribbons comfortably at the back.
Adjust the ribbon length if necessary.
How to Adjust Your Crochet Flower Headband Size
One of the advantages of this design is its adjustable fit.
The flower section sits at the front of your head as a decorative band, while the ties secure the headband at the back.
For a longer decorative section, crochet additional flower motifs.
For a shorter section, use fewer flowers.
You can also experiment with thicker yarn and a larger hook to create larger flowers, although this changes the finished dimensions.
Before finishing the headband, place the flower strip against your head to check the coverage and comfort.
Best Crochet Flower Headband Color Ideas
1. Cream Crochet Flower Headband
Cream and ivory yarn create a timeless, elegant accessory.
This neutral shade pairs beautifully with summer dresses, linen clothing, and casual outfits.
2. Dusty Pink Crochet Flower Headband
Dusty pink gives your flower headband a soft, romantic appearance.
It’s a lovely choice for spring outfits and handmade gifts.
3. Chocolate Brown Crochet Flower Headband
Chocolate brown creates a warm, earthy design.
This color works especially well with beige, cream, and autumn-inspired clothing.
4. Multicolor Crochet Flower Headband
Try combining cream, pink, and sage green flowers.
Alternating colors between motifs creates a playful handmade look.
Common Crochet Flower Headband Problems
Why Are My Crochet Flowers Curling?
Curling can happen when your stitches are too tight or the petals contain too many stitches for the available space.
Try adjusting your tension or hook size.
If the flowers continue to curl, review the petal stitch counts before making the remaining motifs.
Why Are My Crochet Flowers Different Sizes?
Uneven tension can cause flower motifs to vary in size.
Use the same yarn, crochet hook, and stitch count for every flower.
Measure your completed motifs before joining them.
Why Does My Flower Headband Feel Too Loose?
If your headband slips, adjust the ties or shorten the decorative flower section.
The headband should rest comfortably against your head without pulling.
Why Do My Joined Flowers Look Uneven?
Check that the flowers are arranged consistently before sewing.
Join the same petal positions on each flower and avoid pulling the connecting stitches too tightly.
How to Wash and Care for Your Crochet Flower Headband
Proper care can help your handmade accessory maintain its shape.
Washing: Follow the yarn manufacturer’s care instructions. If suitable for handwashing, use cool water and mild detergent.
Drying: Gently press out excess water without wringing. Lay the headband flat on a clean towel.
Reshaping: Arrange the flower petals while the headband is damp.
Storage: Keep your finished accessory in a clean, dry place.
Frequently Asked Questions About Crochet Flower Headbands
Is This Crochet Flower Headband Pattern Suitable for Beginners?
Yes. This pattern uses basic crochet stitches, including chains, slip stitches, single crochet, and double crochet.
If you’re new to crochet flowers, practice one flower motif before beginning the full headband.
How Many Crochet Flowers Do I Need for a Headband?
The number depends on the size of each flower and the desired length of the decorative section.
Make several flowers, arrange them in a row, and measure the strip before joining them.
How Long Does It Take to Crochet a Flower Headband?
The time depends on your experience, the number of flowers, and the joining technique.
Beginners may need additional time to practice the flower pattern, while more experienced crocheters may finish faster.
How Do I Make My Crochet Flower Headband Bigger?
To make the decorative section longer, crochet more flower motifs and join them to the strip.
You can also experiment with thicker yarn and a larger hook, although this will change the size and appearance of each flower.
What Yarn Is Best for a Crochet Flower Headband?
Lightweight cotton yarn is a useful option because it creates defined stitches and a comfortable accessory.
Changing yarn weight may affect the size and appearance of the flowers.
Can I Make a Crochet Flower Headband Without Sewing?
Yes, but you’ll need a different joining technique.
A join-as-you-go method can connect flower motifs while crocheting, while this tutorial uses a yarn needle for joining.
Can I Make This Headband in Different Colors?
Absolutely!
Try cream, dusty pink, chocolate brown, sage green, or soft yellow.
You can also combine several colors in one headband.
Can I Use These Crochet Flowers for Other Projects?
Yes. Individual crochet flowers can decorate bags, scarves, hats, and other handmade accessories.
More Free Crochet Headband Patterns
Looking for more handmade crochet inspiration?
Explore these tutorials on InfoCrochet:
Discover different crochet headband styles, beginner techniques, and creative accessory ideas.
Save This Crochet Flower Headband Pattern for Later
Love this crochet flower headband idea?
Save this free crochet flower headband pattern to your favorite Pinterest crochet board so you can find it whenever you’re ready to start.
Choose your favorite yarn colors and create your own handmade floral accessory.
Final Thoughts
Making a crochet flower headband is a creative way to practice basic stitches while creating something beautiful and useful.
With five-petal flowers, adjustable ties, and endless color combinations, this beginner-friendly design offers plenty of opportunities for customization.
Whether you choose cream, pink, or chocolate brown, your finished headband can add a lovely handmade touch to your everyday outfits.
Happy crocheting!